Has your kid’s power wheels gearbox broken down? Or is it producing some weird noises every time your child drives it?
Well, if that is the case, then it’s time to upgrade the power wheels gearbox. Many parents have complained that these toys’ gearboxes tend to break down with time.
Luckily, there is a solution to this problem: replacing the plastic gears with metal ones.
Table of Contents
How to Upgrade Your Kid’s Power Wheels Gearbox?
A considerable percentage of the power wheels in the market come with plastic gears which tend to wear out with time. And this can result in the toy vehicle losing and costly repairs.
Therefore, to overcome this problem, some parents have opted to upgrade the gearboxes of their kid’s power wheels.
Upgrading the gearboxes of these toy cars means replacing their first gears with metallic one. These durable steel gears come with steel ball bearings that help increase their lifespan while reducing heat.
Luckily, replacing the power wheels’ gears is a straightforward project that can by any parent at the comfort of their home.
You will need a drill for newer models, a well-lit workstation, a socket wrench, steel gears, grease, and a screwdriver for this DIY project.
To upgrade your kid’s power wheels’ gearbox, you should do the following:
Step 1: Overturn the power wheels and remove the wheels
Since this toy vehicle is battery-powered and has no fluid, then overturning it in a well-lit workstation like the garage floor, front yard, or pavement won’t be a problem.
Plus, you don’t have to remove all the wheels; remove the ones next to the motors. So, if your toy vehicle has two motors, then you will have to remove both wheels.
Start by popping open the axle cover using a screwdriver to access the toy car’s retainer nut. Loosen the screw holding the axle retainer nut in place using either a screwdriver or a power drill and then pull it out.
Once the retainer nut is removed, the tire will be free and ready to be pulled out. You can remove the tire and then pull the adjacent tire without necessarily detaching it from the axle.
Step 2: Remove the toy vehicle’s protective cover
After removing the tires, you will have full access to the protective cover and its screws. Start loosening the screws using either the power drill or screwdriver.
Remember, the number of screws varies with the power wheel model, but most have about eight screws. With the screws removed, you can remove the cover and put it in a safe place.
Make sure you put the screws in a secure place.
Step 3: Remove the power wheels’ gearboxes
With the axle and protective cover removed, the toy car’s gearboxes are accessible. So you can unplug the wires connected to the motors and lift the gearboxes.
The motors are normally attached to the gearboxes by some screws. So you can unscrew them and disconnect the motor from the gearbox.
Step 4: Open the gearbox’s casing
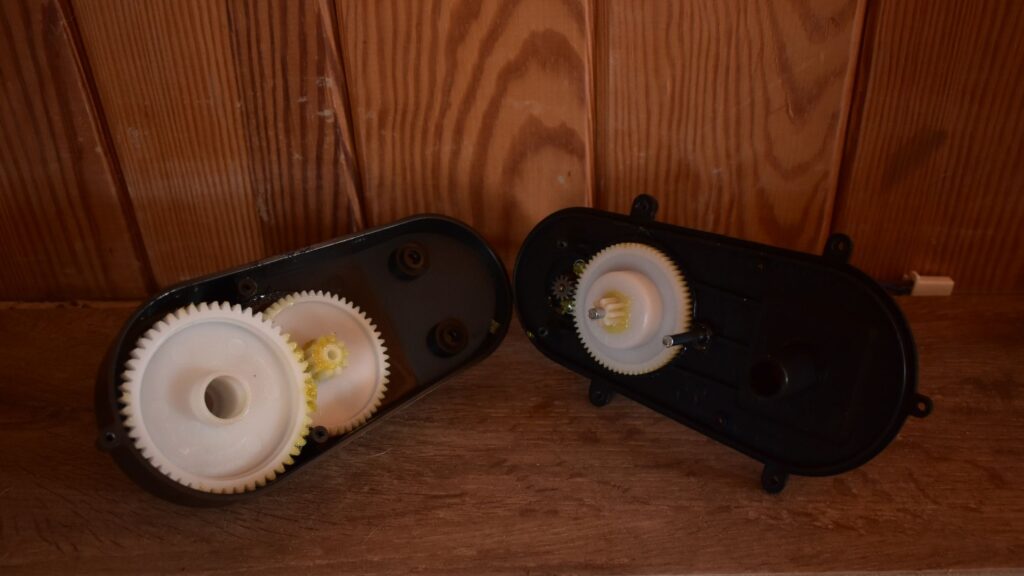
The casings of most gearboxes have four screws, so make sure you remove all of them and store them safely. Push the safety clips on the case and then open the cover to expose the gears.
Inside the gearbox, you will find some plastic gears arranged in a sequence, with each one of them attached to a shaft.
The largest gear, normally the fourth gear, is normally on top, followed by the second biggest, with the smallest (the first gear) being positioned next to the gearbox casing.
The first gear is the one connected to the motor.
Step 5: Remove the gears and clean the gearbox
Remove all the plastic gears and then clean the gearbox. Wiping the gearboxes clean will help you eliminate the plastic shavings and grime, ensuring that the gears will function seamlessly once reinstalled.
Step 6: Replace the first gears
Replace the first gears in both gearboxes with steel ones, and if you were careful when buying the metal gears, they would fit perfectly.
Reinstall the other gears and then apply some grease on all the gears. This will help reduce friction and leave the gears rotating smoothly. Make sure you test the gears before reassembling the gearboxes.
Step 7: Reassemble the gearboxes
With all the gears rotating smoothly, you can finally reinstall the gearbox’s cover and snap the safety clips back in place before locking it tightly with its four screws.
Repeat this process with the other gearbox and only replace the first gear with a steel one.
Step 8: Connect the gearbox to the motor
Before installing the gearboxes in their compartments, you have to connect them to the motors. These two components are normally connected by two screws.
So before screwing them together, you can connect the motor to the motor mount if it has one. The motor mount keeps the motor in place.
Unfortunately, motor mounts are only available with faster and high-end motors.
Next, screw the first screw in without tightening it and then put the other screw in place and tighten it. Once it’s tightly screwed, you can tighten the first screw, and you’re good to go.
Step 8: Install the new gearbox and motor
Slide the gearboxes and motors onto their compartments. Make sure you spin the motor really fast to ensure that it’s working.
Once you have confirmed that everything is okay, you can plug the wire harness into the motors.
Step 9: Install the protective cover
Replace the protective cover and make sure all the screws are tightly screwed in place to prevent them from falling when your kid is driving faster on a rough surface.
Step 10: Reattach the wheels to the axle

Push the tire that is still attached to the axle through the gearboxes’ mounts and then attach the other tire to the axle and lock it in place.
Attach its retainer nut before screwing it tight, and don’t forget to return the axle cover in place.
Benefits of upgrading the gearbox
With an upgraded gearbox, the performance of your kid’s toy car will improve.
Since the gears are reinforced, they won’t be easily ground down or overheat, which is especially crucial for the first gear that connects with the motor.
Other than enhancing the performance of the power wheels, the upgraded gearboxes will last longer. The quality of the steel gear is noticeable as it won’t wear down faster than the plastic first gear.
Can Upgrading the Gearbox Increase the Power Wheels Speed?
Replacing the first gear with a metallic one can help increase the durability of the gearboxes and leave the toy vehicle working efficiently.
But if you want to increase the speed of your kid’s toy car, you need to replace the current gearbox with a powerful gearbox, battery, and motor. This will give the toy more power and make it drive even faster.
It’s a known fact that the voltage of the gearbox must match that of the power wheel’s motor and battery.
So when buying the right metallic gearboxes for your kid’s power wheels, you should make sure that their voltage matches its current plastic gearbox.
For example, if the toy vehicle has a 24v motor and 24v battery, you should get a 24v metal gearbox.
But if you want to install an even robust gearbox, you should be ready to purchase a matching motor and battery.
After all, installing an even more powerful gearbox than your current one without a matching motor and battery can later result in costly repairs.
How Do I Know When to Upgrade the Power Wheels’ Gearboxes?
Knowing when to upgrade the gearboxes of this toy’s gearboxes is crucial, as it can save you time and money in the long run.
Luckily, there are numerous signs to watch out for, and one of the main ones is the loss of power and speed.
With the worn-out gears not functioning correctly, this toy car won’t be efficient, which can be very devastating for your kids.
Other signs to monitor are the grinding noises produced by the gearboxes when your kid is driving. These noises are made by worn-out gears that try to secure connections with the other gears unsuccessfully.
This will even cause the motors to overheat.
Final Thoughts
The gearbox is one of the most crucial parts of this toy car. It is the one responsible for turning the wheels when the toy car is being driven.
Unfortunately, most power wheels come with plastic gears which wear out faster. And without proper maintenance, these plastic gears can leave you with costly repairs.
Therefore it’s crucial that you upgrade the first gear in this toy vehicle’s gearbox with a hardened steel gear that is highly durable.
Upgrading the gearboxes will also increase the efficiency of the power wheels and prevent some of the common issues affecting these toy vehicles.
So instead of waiting for your kid’s toy car to break down, why don’t you upgrade it?


")
")
